Create EventListener via BuildPiper UI
There are two ways using which teams can create an EventListener. It can be done via,
- BuildPiper UI
- BPCTL
Creating EventListener via BuildPiper UI#
You can create an EventListener for,
- GitLab Account
- GitHub Account
- Bitbucket Account
All you need to do is to,
- Sign into the BuildPiper User Portal.
- After signing in, you'll enter the Central dashboard.
- Click on Integrations and then go to "Git Events".
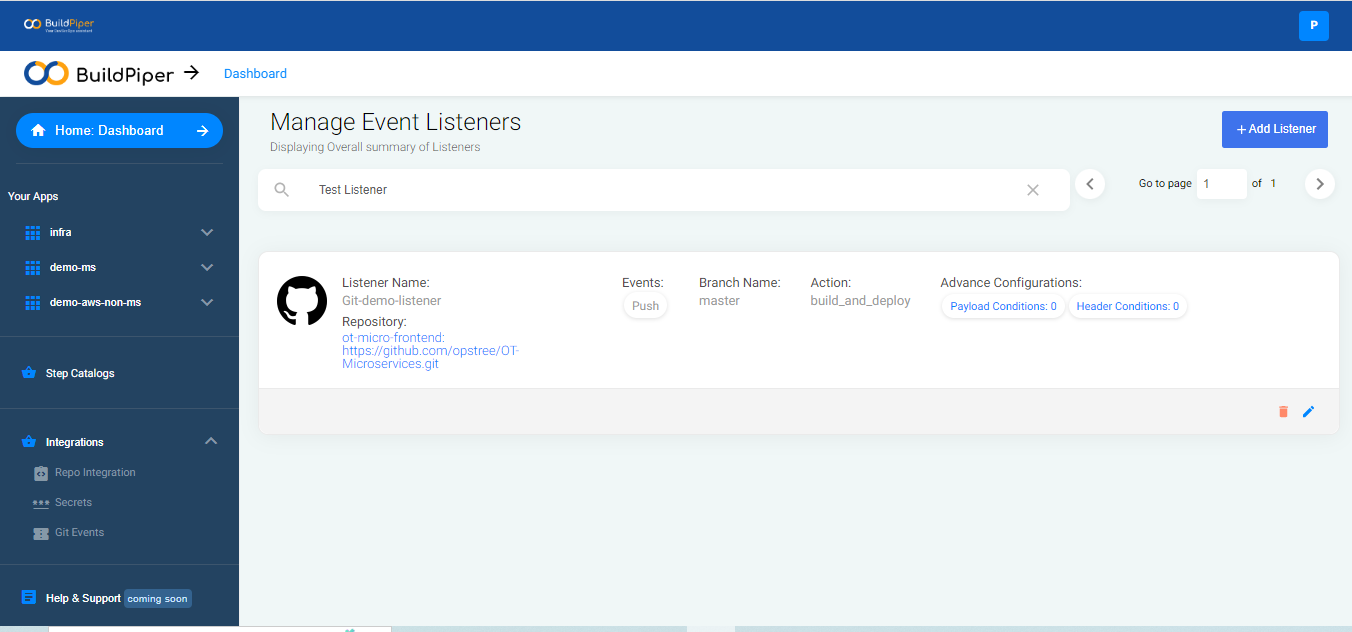
- Once you click on "Git Events", you'll see the screen to "Manage Event Listeners". This screen contains information of all listeners.
- On the top-right corner of this screen, click on "Add Listener" button to create a new EventListener.
- Provide a Listener name.
- Choose the GIT URL where you’ve configured the webhook and then load the branches.
- Select the Branch.
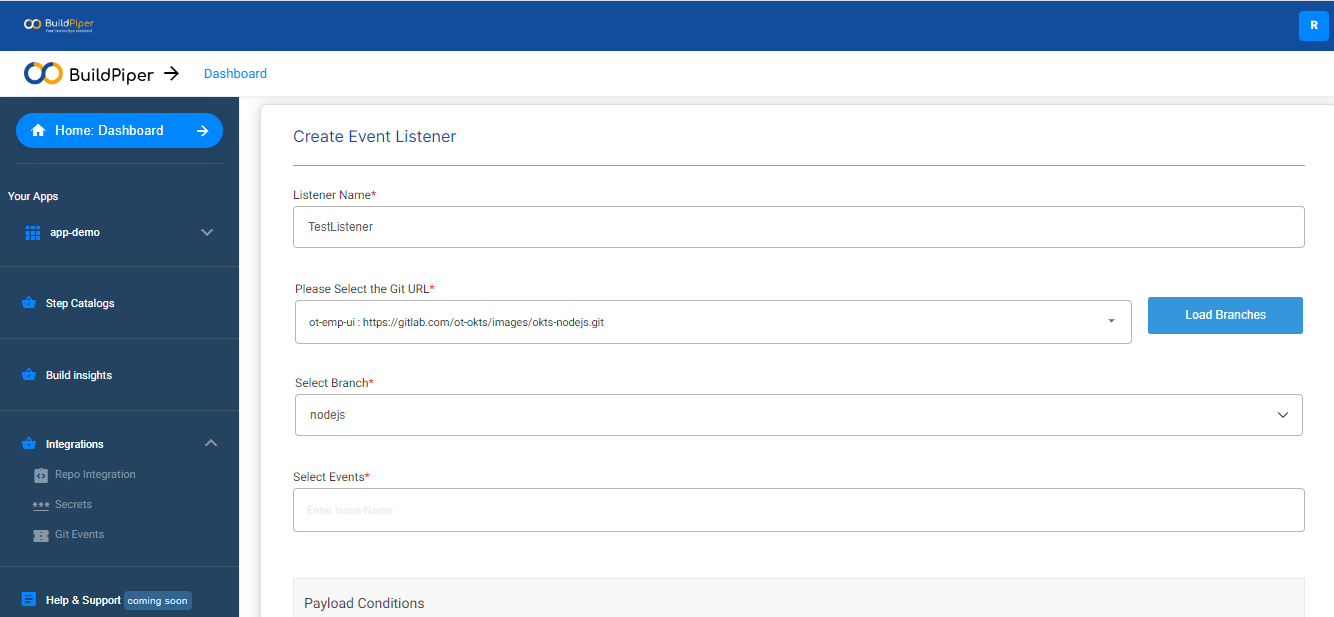
- Choose the event for which you want a webhook request to be triggered.
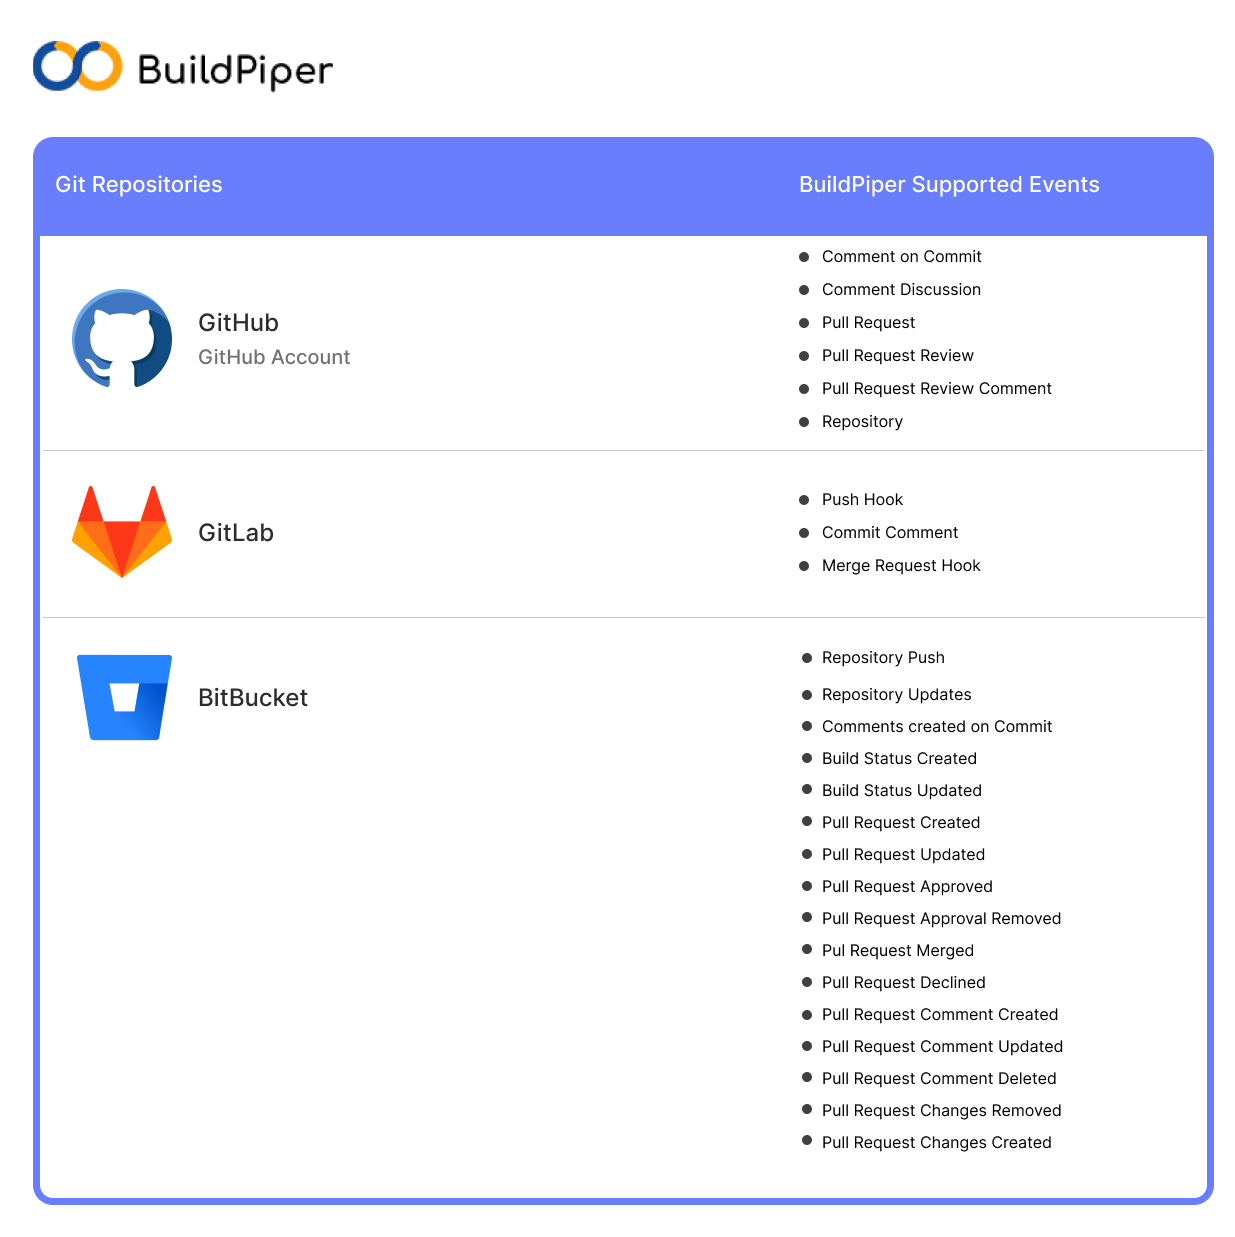
BuildPiper supports the following events for GitHub, GitLab and Bitbucket Accounts.
This event listener created through the BuildPiper UI receives the message and then triggers the specified actions.
Once you’ve chosen the event type, you need to add the Payload and Header Conditions.
Add Payload Conditions#
Payload: The payload is the message content sent from the origin and received at the destination.
- Setup Payload Conditions by entering the Payload Variable Path.
- Specify the value
- Choose the comparison operator.
- Only when the variable path details match the specified value, the action is triggered.
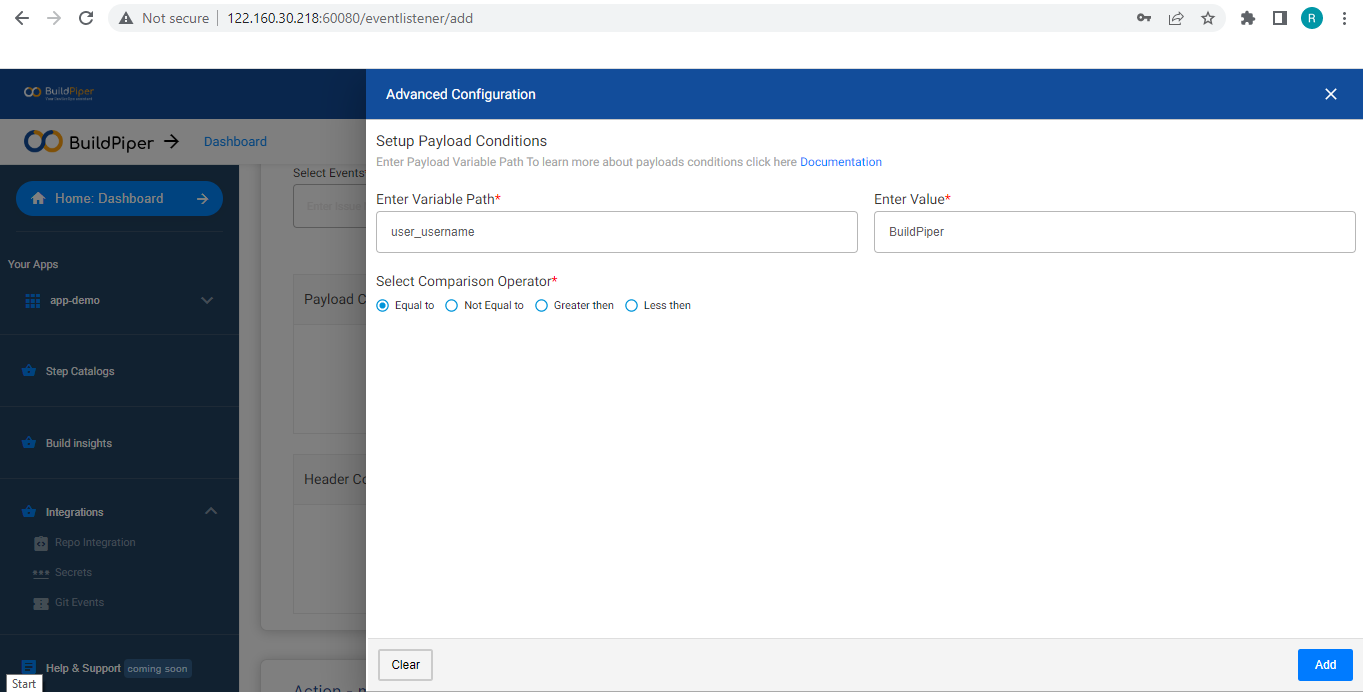
Example: Here, we've entered the variable user path as user_username and specified its value as “BuildPiper”. In this case, if the user_username is BuildPiper, only then the desired action(received through the webhook request) will be triggered.
Add Header Conditions#
Header: The headers contain the complete information that allows the routing of network packets from an origin to a destination.
- Set up the Header Conditions by entering the Header Variable Path.
- Specify the value.
- Choose the comparison operator.
- Only when the variable path details match the specified value, the action is implemented.
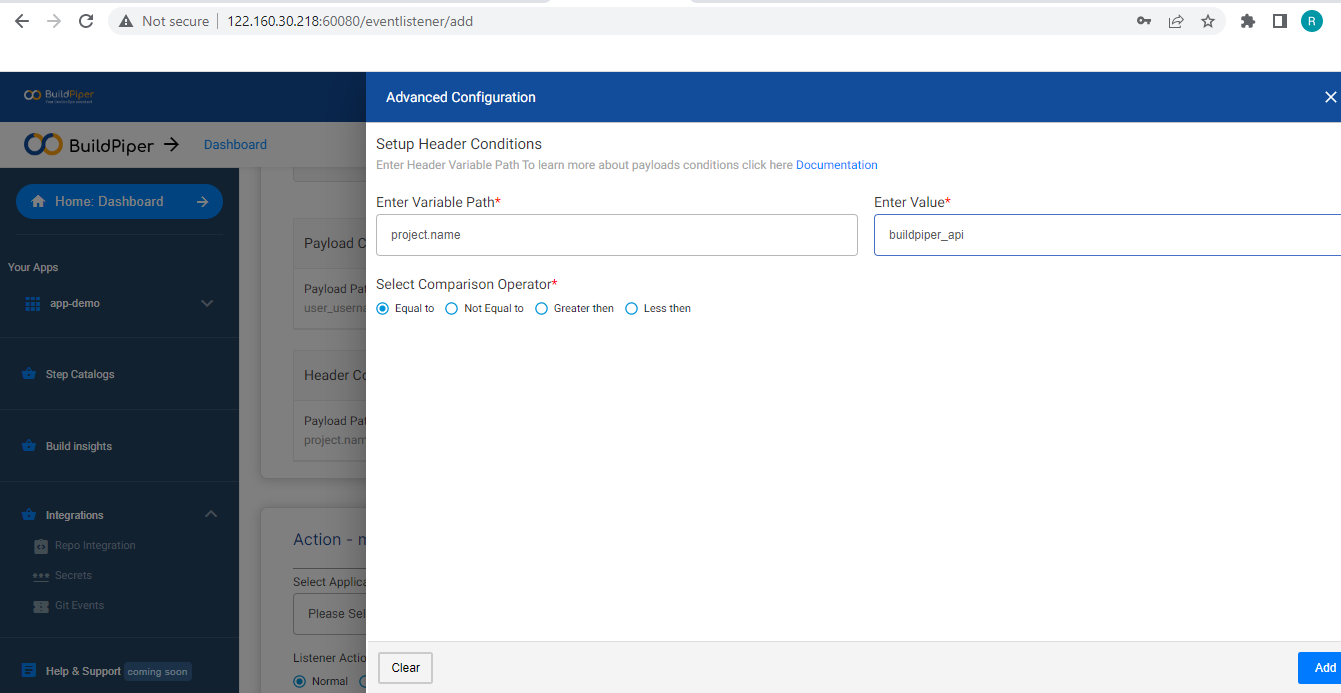
Example: Here, we've entered the variable user path as project.name and specified its value as “buildpiper_api”. In this case, if the project.name is “buildpiper_api”, only then the desired action(received through the webhook request) will be triggered.