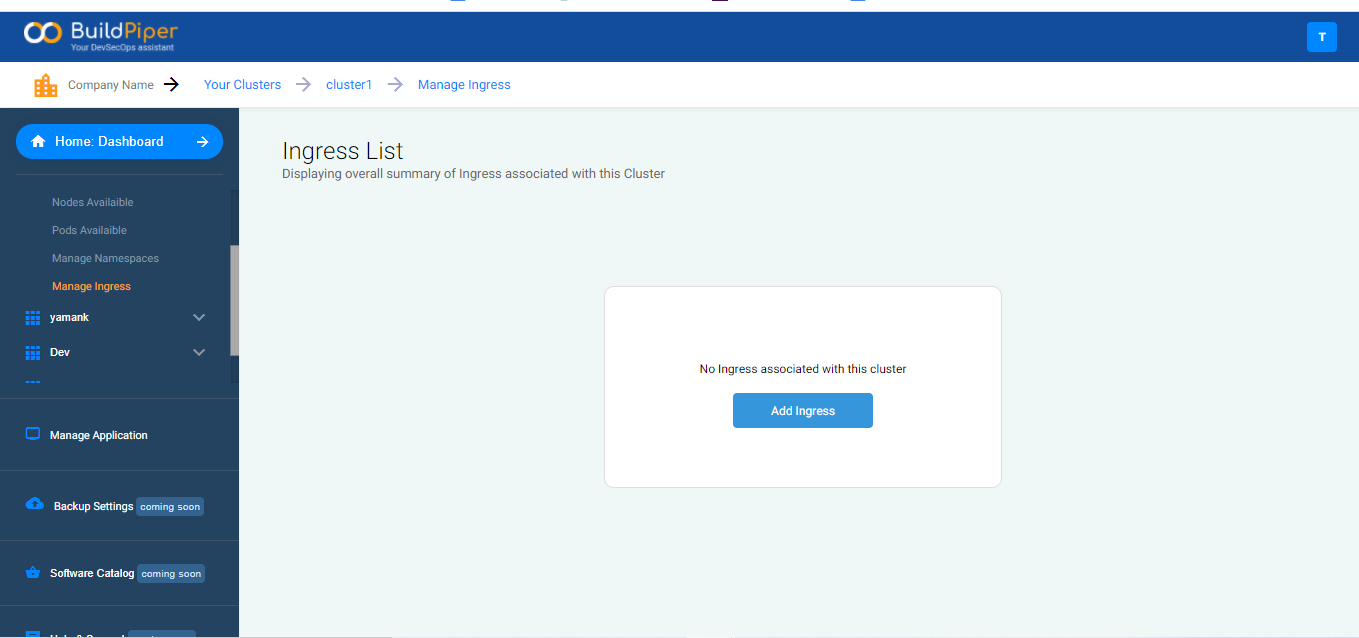
Create Ingress
BuildPiper deploys the “Convention over Configuration” approach to make Kubernetes cluster management extremely simple and highly secure. It offers 3 categories of services which include,
Public Services : These are the services that are accessible publicly over the internet.
Protected Services : Protected services are those services that are accessible to a limited audience via the internet and IP whitelisting.
Private Services : These are the services that are accessible within the realm of K8s.
To make it extremely easy and convenient for users to categorize these services and define their access policy, Buildpiper provides the option to create Public and Protected Ingress. Ingress allows access to your services from outside the Kubernetes cluster. This helps add an extra layer of authentication and security to the Kubernetes cluster.
Public Ingress allows everyone to access the requests within the cluster and exposes the containerized applications globally over the internet. On the other hand, Private Ingress provides restricted access to the requests in the cluster. Here are simple details that you need to enter to add Ingress to your cluster.
1. Give a specific name to the Ingress.
2. Specify the Ingress URL.
3.Select the Ingress type. Buildpiper provides two types of Ingress which include
- Public Ingress
- Protected Ingress
4. Fill in the Ingress class. This should be unique for the same cluster.
5. Select Namespace. BuildPiper also provides an option to add namespace through the UI-driven option.
6. Choose a strategy to set up Ingress for your K8s cluster. You can add Ingress via a guided form or by uploading a custom Ingress file through Manifest File Upload, Git URL, or via Helm Templates.
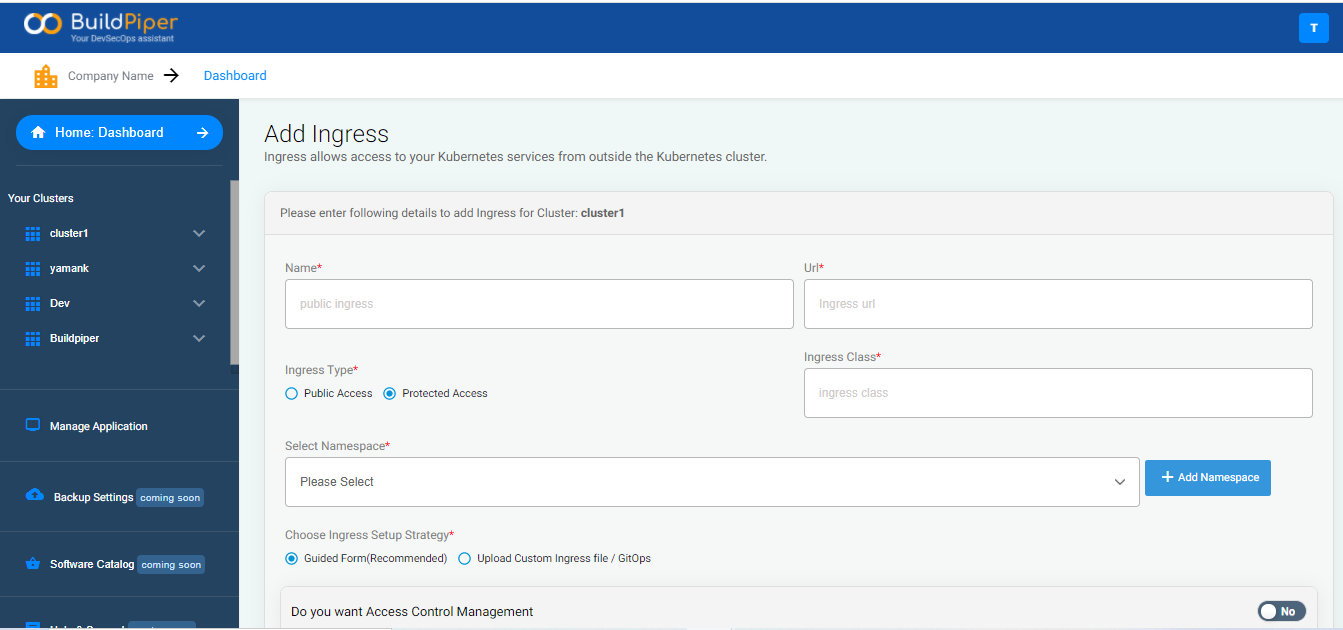
7. Choose Yes/No if you want an Access Control Management. If you choose yes, specify the ACM value.
8. Choose a protocol. -TCP -HTTP
9. Specify and add the whitelisted IPs if you want to set up Protected Ingress for the cluster.
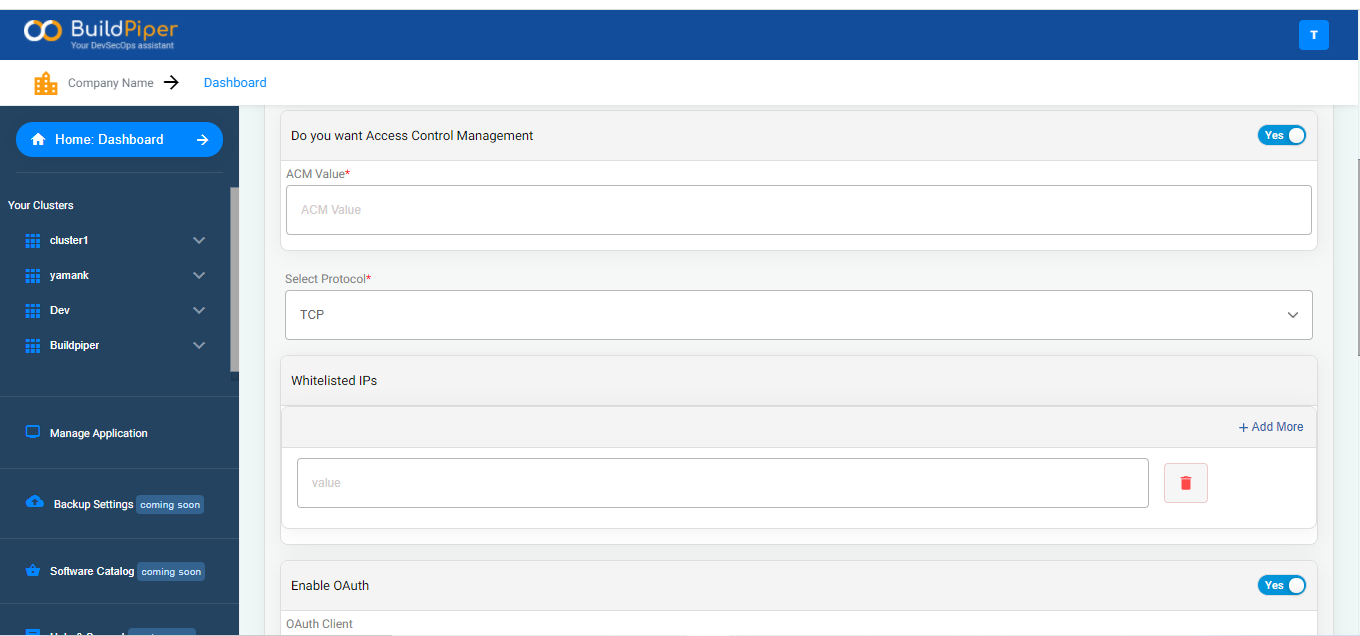
10. Enter the below-mentioned details if you choose to enable OAuth.
11. Specify the OAuth client.
12. Mention the client ID and enter the client secret.
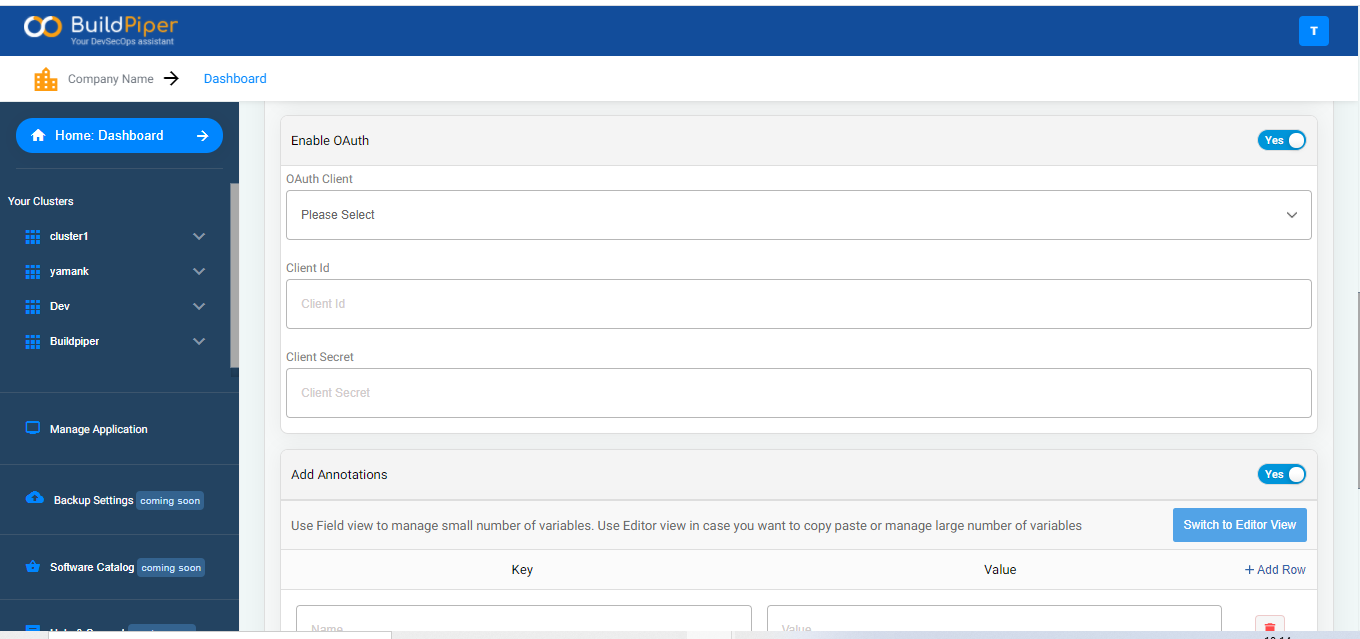
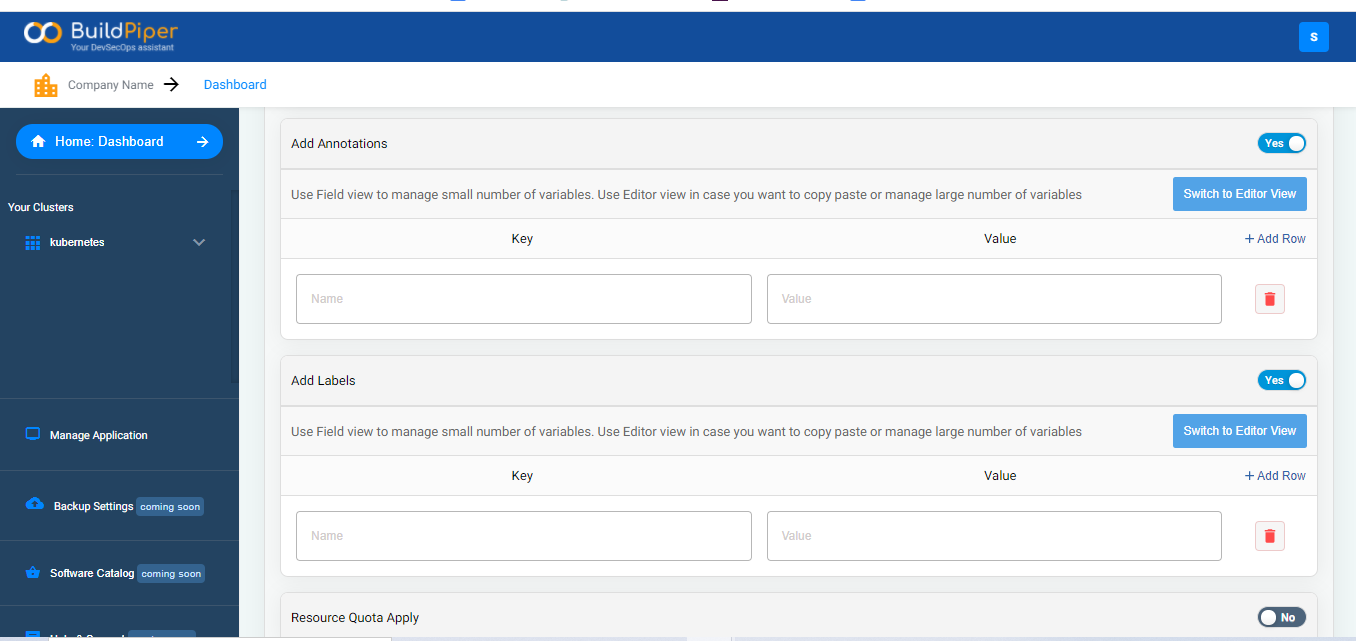
13. Enable the Yes button to add Annotations and labels. You can use the Field view to manage a small number of variables. Use the Editor view in case you want to copy-paste or manage a large number of variables.
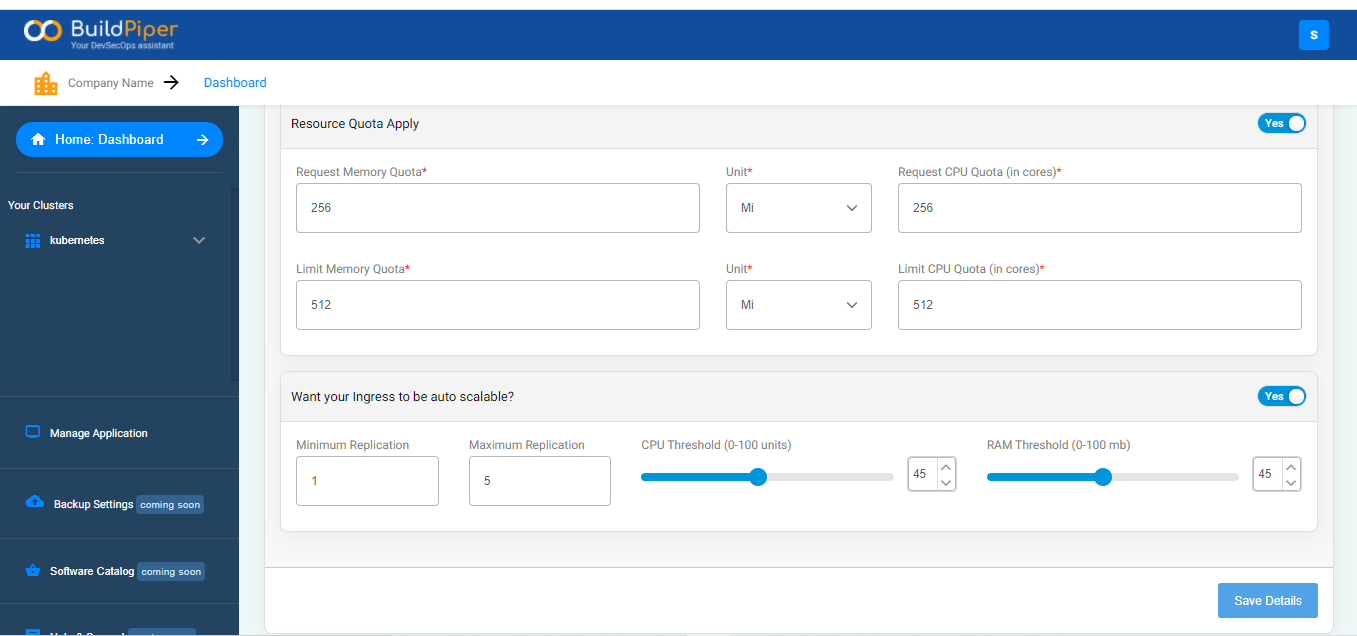
14. Specify the details for the starting and the maximum limit for allocation of resource quota.
15. Choose the Memory Quota that is required and specify the unit.
16. Mention the CPU Quota that is required.
17. Enter the maximum amount of Memory Quota that is required and specify the unit for the same.
18. Specify the maximum amount of CPU Quota.
19. BuildPiper provides users with the option to select whether they want the Ingress to be auto-scalable or not. If you choose your Ingress to be auto-scalable, you need to enter these details.
- Minimum Replication- the minimum number of pods that need to be replicated.
- Maximum Replication- the maximum number of pods that can be replicated.
- CPU Threshold- Specify and allocate the CPU quota.
- RAM Threshold- Specify and allocate the memory quota.