Add Namespace
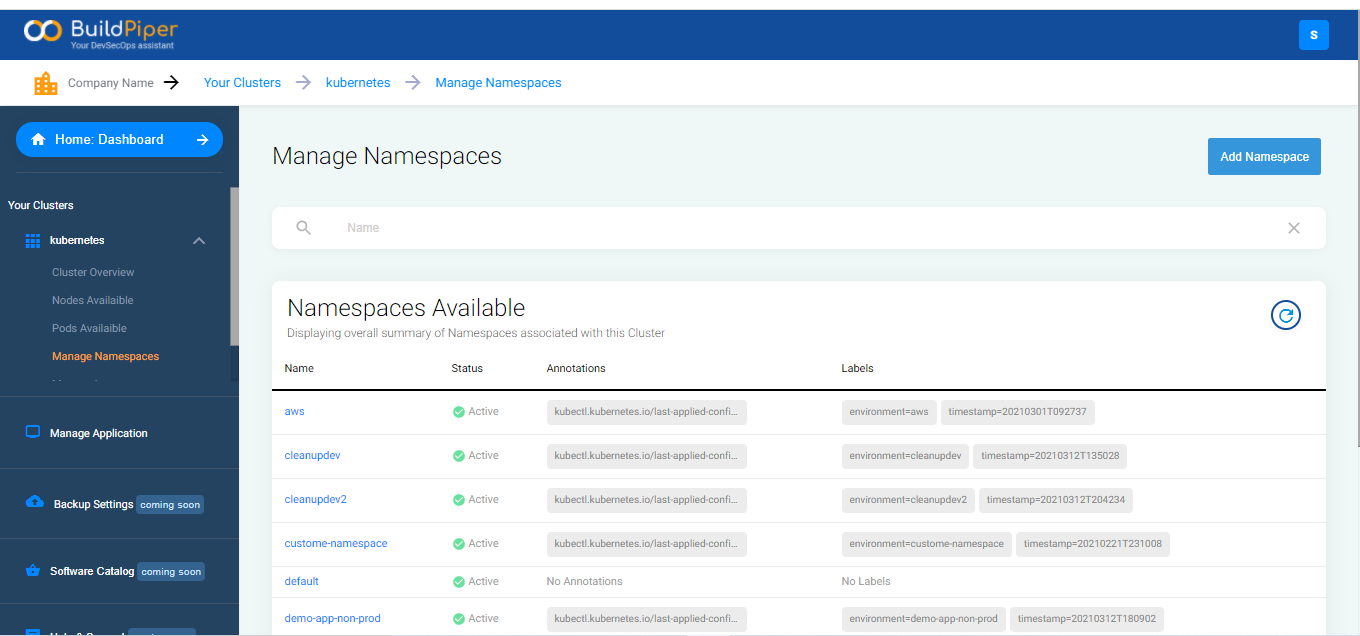
BuildPiper has out-of-the-box capabilities to support Namespace management. You can read here to know more about Namespaces. Here is how the “Manage Namespace” screen of the product looks like.
Here is how you can add Namespace to the Kubernetes cluster. All you need is to provide the following details.
1. Give a unique name to the Namespace you want to add to the cluster.
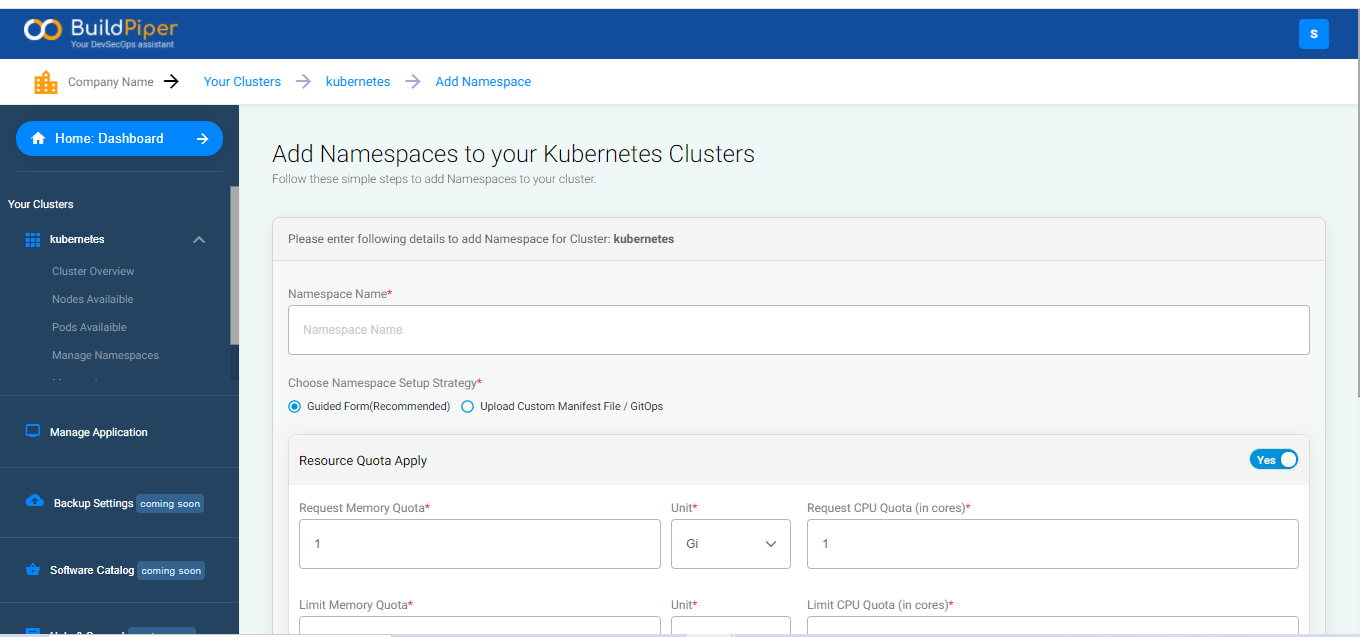
2. Choose a Namespace setup strategy. BuildPiper allows managing Namespace via,
- Guided Form - Users need to fill in the required details in the UI-driven form to create a Namespace.
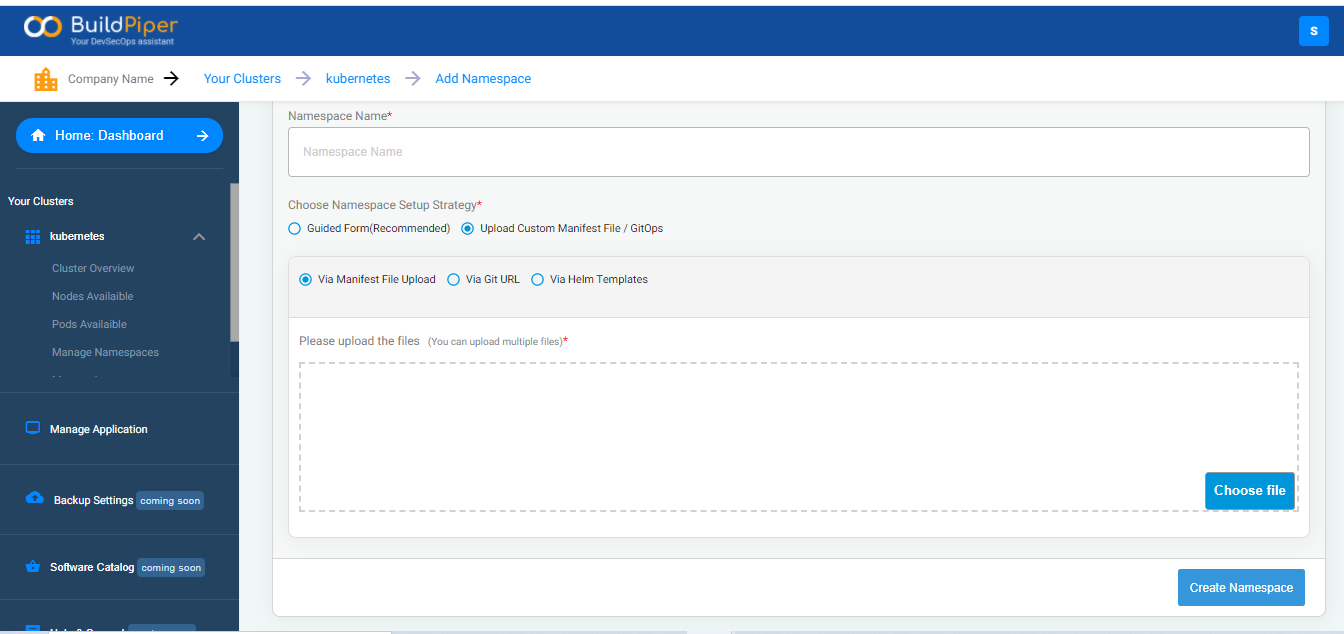
- Uploading the Custom Manifest file - Users can upload the manifest file and add Namespace via Manifest File Upload, via Git URL, or via Helm Templates.
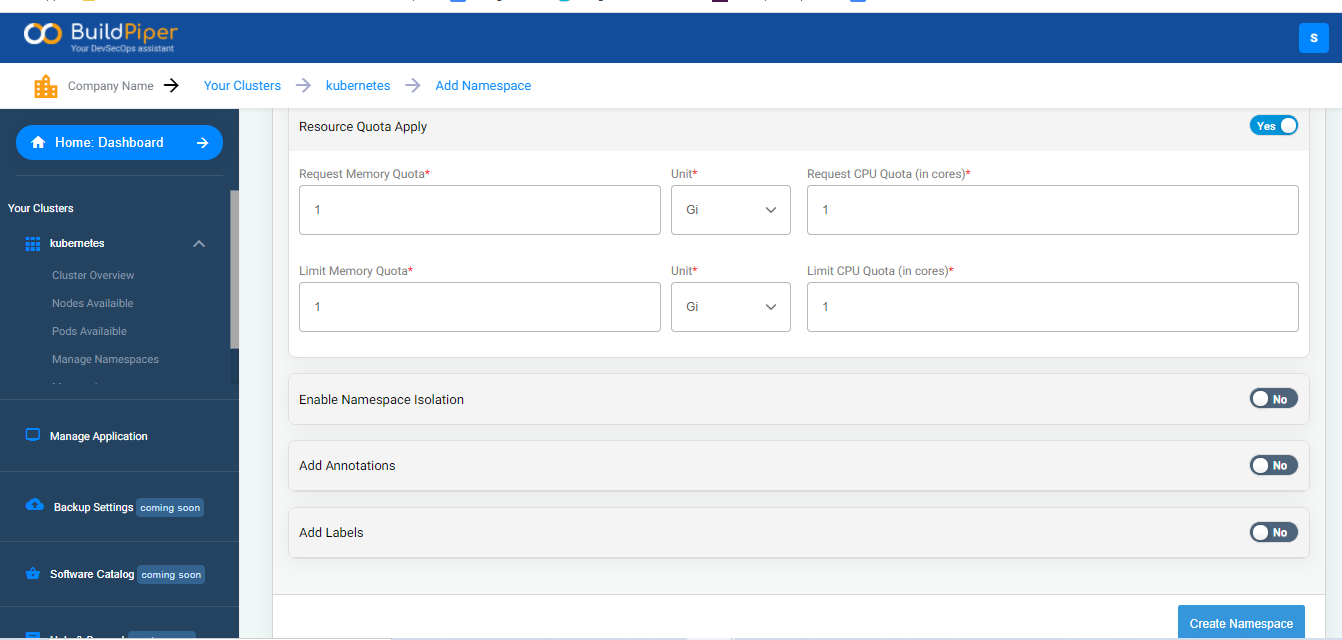
3. Allocate the Memory Quota and CPU Quota that is required and specify the unit.
4. BuildPiper provides the option to enable Namespace isolation. If the users wish, they choose the Yes option to enable it or choose No to disable it.
5. Enable the Yes button to add Annotations and labels. You can use the Field view to manage a small number of variables. Use the Editor view in case you want to copy-paste or manage a large number of variables.